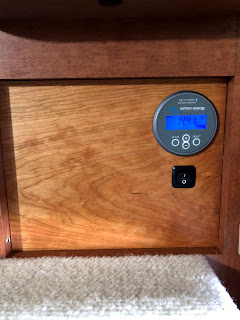
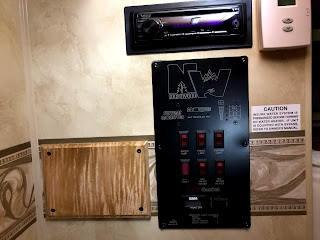
This entire project started because the AGM batteries in our 2014 Arctic Fox 1150 were 7 years old and were getting pretty tired. We decided to switch to lithium batteries and discovered that neither the Zamp solar controller or the Progressive Converter/Charger we had would support lithium. Since we needed to replace them, we decided to go a step further and install an inverter/charger to provide 120V power without being plugged in or running a generator. We also wanted to be able to keep the batteries charged without having to carry a generator. That resulted in upgrading to an MPPT solar controller and the addition of a DC/DC charger to the system which will connect to a heavier 2 AWG wire running from the truck alternator via an SB175 Anderson Connector.
 |
| Victron Multiplus 12V 2000 watt inverter/charger |
Once we made the decision to upgrade and add all these components, we started by tracing the existing wiring. We had previously removed the plywood from the bottom of the camper and having access to the underside made this, not easy, but at least easier than it could have been.
The battery box in our TC would fit 2 of the Battleborns, but since we were adding an inverter, we knew we would be using more power and wanted to add an additional battery. We do not have an onboard generator, so the generator compartment became the new battery box. In order to make room for everything, we stripped almost everything out of the generator compartment. That meant removing the 120V wiring and connection box, the 2 AWG DC wiring that ran to the old battery compartment, and the gas line that ran down to the gas outlet under the bumper (which we had never used).
|
|
The inverter was probably the most challenging to find a spot for since it was the largest component. We decided to install it where the sliding tray used to be. We had removed the tray several years ago because it jammed every time we used it despite many attempts to fix it. With the bottom off the camper, we were able to remove the track for the tray as well. We cut a board to fit the bottom of the compartment that provided a level surface and a solid attachment spot for the inverter.
 |
| Sliding tray and track removed New support board installed |
The remainder of the components were installed in the front of the camper. We removed the old charger/converter from under the step to the bed and the 6 AWG wire that was connected to it. We removed the transfer switch from under the kitchen sink being careful to label the wires as we disconnected them so we would know what was what later. We also removed the Zamp solar controller and connected the input to the output wires so they were long enough to reach the new controller.
 |
| Under step to bed with original converter/charger |
Once we were sure we had the space to install all the components we wanted, we worked with Battleborn to properly design how everything needed to go together. They were very responsive in reviewing our proposed design and helping us determine what gauge wire was needed and where fuses should be installed. They were great about answering any questions we had as we went through the install. We made a few tweaks as we went along and ended up with a system that looks like this:
Once we had everything, it was time to start installing the components. The battery disconnect switch, the shunt for the Victron BMV712 battery monitor, and the Victron Lynx Distributor were attached to the rear wall of the old generator compartment (the new battery compartment). We mounted a piece of 3/4" plywood along the back to give the components something solid to attach to. We also made a board to sit under the batteries that would help hold them in position and provide a place to strap them down. We found the bottom of the generator compartment was quite thin so we decided to use caulk to glue the board down rather than relying on screws alone. We cut some additional holes though the left hand wall to allow us to run cables to the inverter and forward to the rest of the components.
 |
| Components installed in generator compartment |
 |
| Battery board with footman loops installed |
 |
| Battery straps fitted and installed |
| The new solar controller was installed under the kitchen sink immediately below the controller for the Reico-Titan jacks. Just below the solar controller we put an electrical connection box where we added new wire to the shore power and the AC fuse panel wires that used to run to the transfer switch. The wire from shore power goes to AC In on the inverter and the wire to the fuse panel comes from AC Out. |
The DC/DC charger was installed under the step to the bed in the spot that used to hold the converter/charger. Like we did in the generator compartment, we mounted a piece of 3/4" plywood along the front wall under the step. We attached the positive and negative bus bars as well as the fuse blocks to the plywood.
 |
| Components installed under step |
Once we had the components in place, we were able to cut the wires and crimp on the lugs. The wires running from the batteries to the Lynx Distributor and from the Lynx to the inverter are 2/0.
 |
| Inverter Installed We put cable sleeves around the cables to protect them from the edge of the inverter case. |
 |
| Battery installation completed |
 |
| Wiring under step completed |
 |
| Wire run out between the battery box (on left)and the water heater |
 |
| Wire gable for 2 AWG wires |
 |
| Front view of Anderson connector The thing hanging down is a dust cover |
We ended up making a bit of a mistake when purchasing an indent crimper for creating the heavier cables and later realizing that same crimper would not work for crimping the Anderson connectors. We originally purchased a TH1818 crimper from TEMCo and should have purchased the TH0006 instead as it would have been able to crimp both the cables and the Anderson connectors. That said, we found the TH1818 indent crimper easier to use, so if you don't need to crimp Anderson connectors, then I would suggest going that route. We purchased directly from TEMCo. Their prices were better than Amazon and shipping was free and fairly efficient.
We purchased a crimper and ferrules from Ferrules Direct. Ferrules made inserting wires into the solar controller and the DC/DC charger so much easier than trying to insert and make a good connection with bare wire.
We also purchased a crimper for MC4 connectors. Our previous solar controller was from Zamp which required the solar panels to be connected in parallel. Our new controller is MPPT which does better with the panels connected in series. We rewired the panels using MC4 connectors so they can easily be changed from series to parallel connections if we ever need to.
The wire, lugs, and Anderson connectors we purchased from Battery Cables USA. We used their extreme battery cable which is amazingly flexible considering it is dual jacketed. They ship stuff really quickly and inexpensively ($3.97 flat rate shipping, no matter how much stuff you buy).
We spent more time designing and planning (and waiting for Fed Ex and UPS) than we did actually installing components. We have done lots of AC wiring, but did not have much experience with DC wiring, especially with the larger gauge wires needed on a system like this. We tried to test fit everything before drilling, screwing or cutting. Overall, I would say that the project went pretty well. We only made a couple of relatively small mistakes that we were able to fix without too much hassle.
We have tested the system while sitting in the driveway, and are quite pleased with the way everything is working. The bluetooth enabled Victron components and the Victron Connect app work very well. It is awesome to be able to monitor and change settings on all the components from our phones. We are very much looking forward to getting out camping and giving the system a real test.


No comments:
Post a Comment